Product Quantity Buttons is a simple yet powerful WordPress plugin that integrates with WooCommerce, allowing users to easily adjust product quantities on the single product page. The plugin adds "Increase" and "Decrease" buttons for seamless quantity management, making the shopping experience more user-friendly and intuitive.
Table Of Contents
With Product Quantity Buttons, customers can quickly change the number of products they wish to purchase without manually typing the quantity value. This enhances usability and helps boost conversions by providing a smoother and more efficient purchasing process.
Product Quantity Buttons plugin made it so easy for our customers to adjust quantities on the product page, resulting in a smoother shopping experience. Highly recommend for WooCommerce users!
Sarah Johnson (Marketing Manager of TechSavvy Stores)
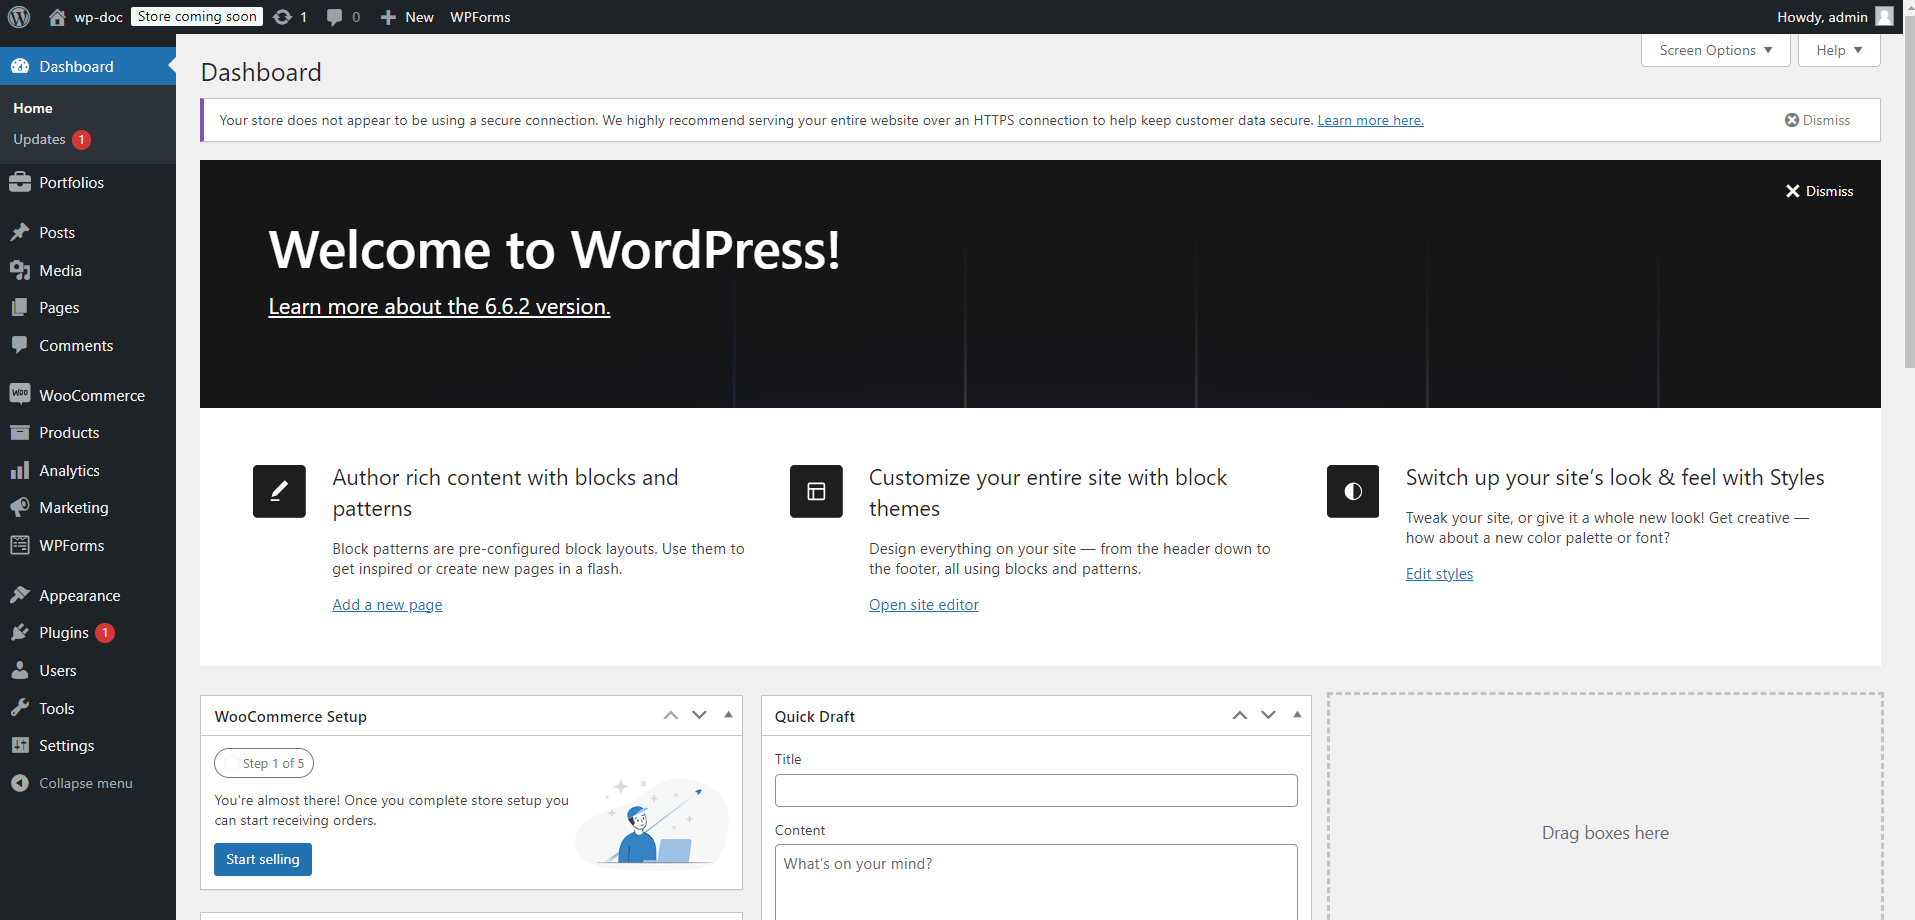
Step 01: First we have to go to the WordPress dashboard.
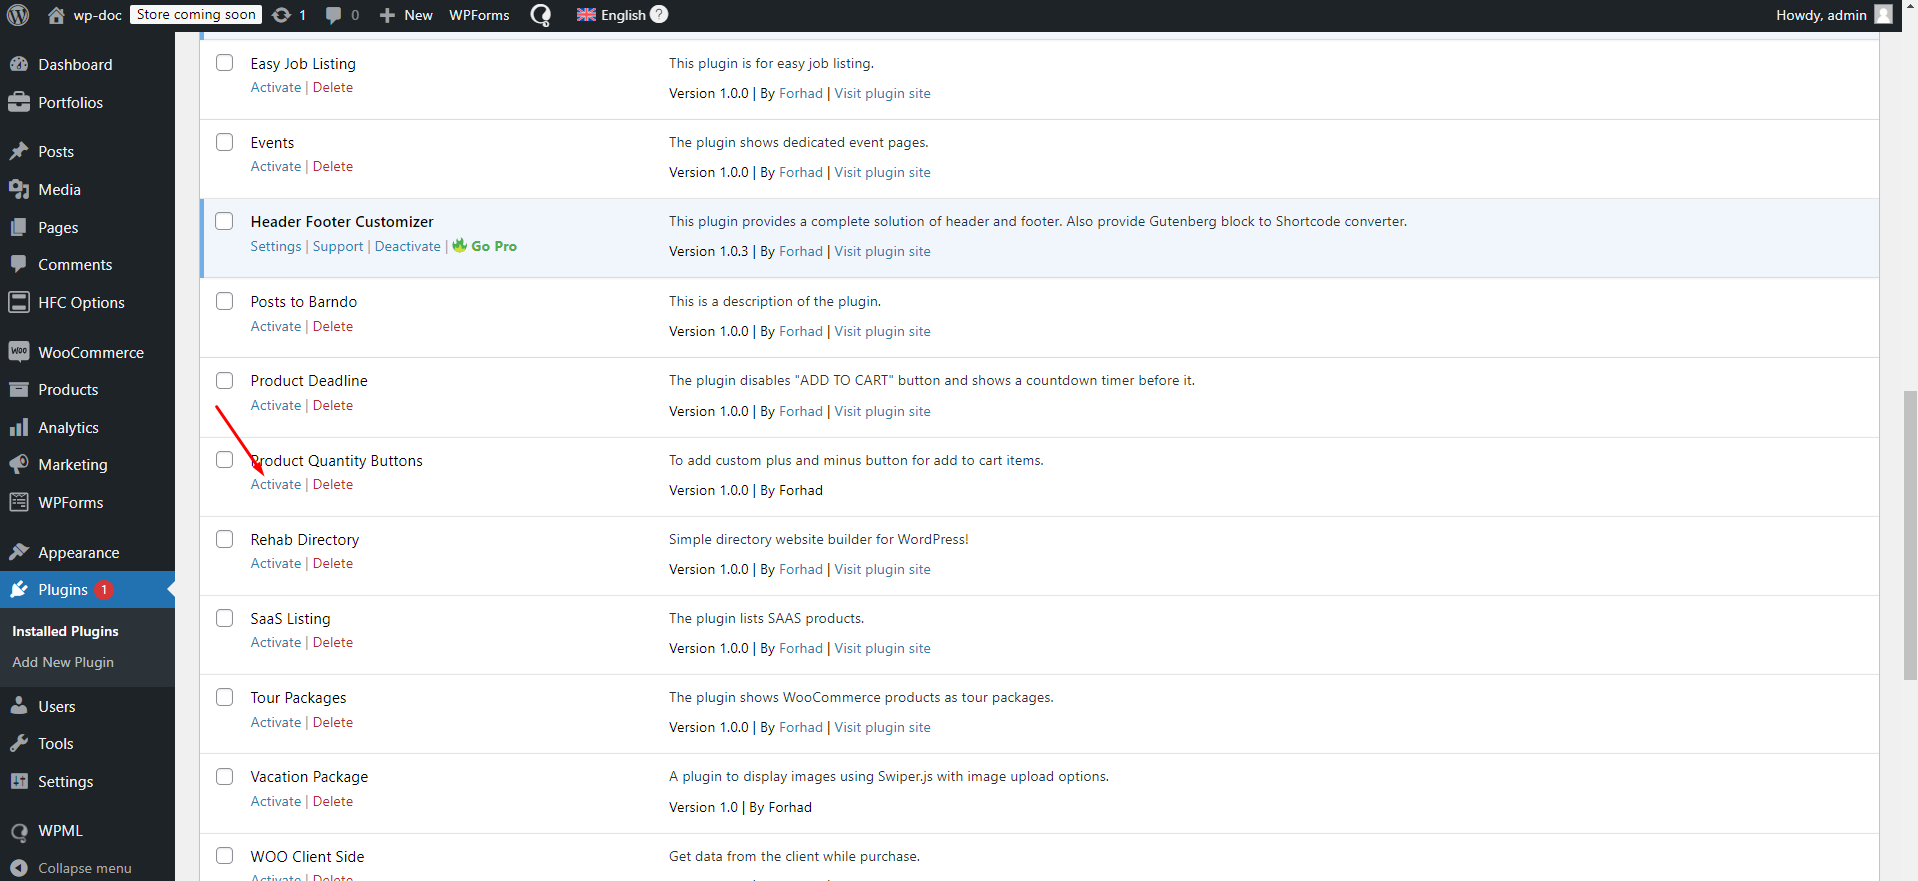
Step 02: Then we have to click the Plugins option from the dashboard. Then we have to click “Add New Plugin” button , from there we have to click “Upload Plugin”. Then we have to choose the plugin from our device. Then we have to click install button. Here we can Active The Plugin or we may active it later from Plugins options
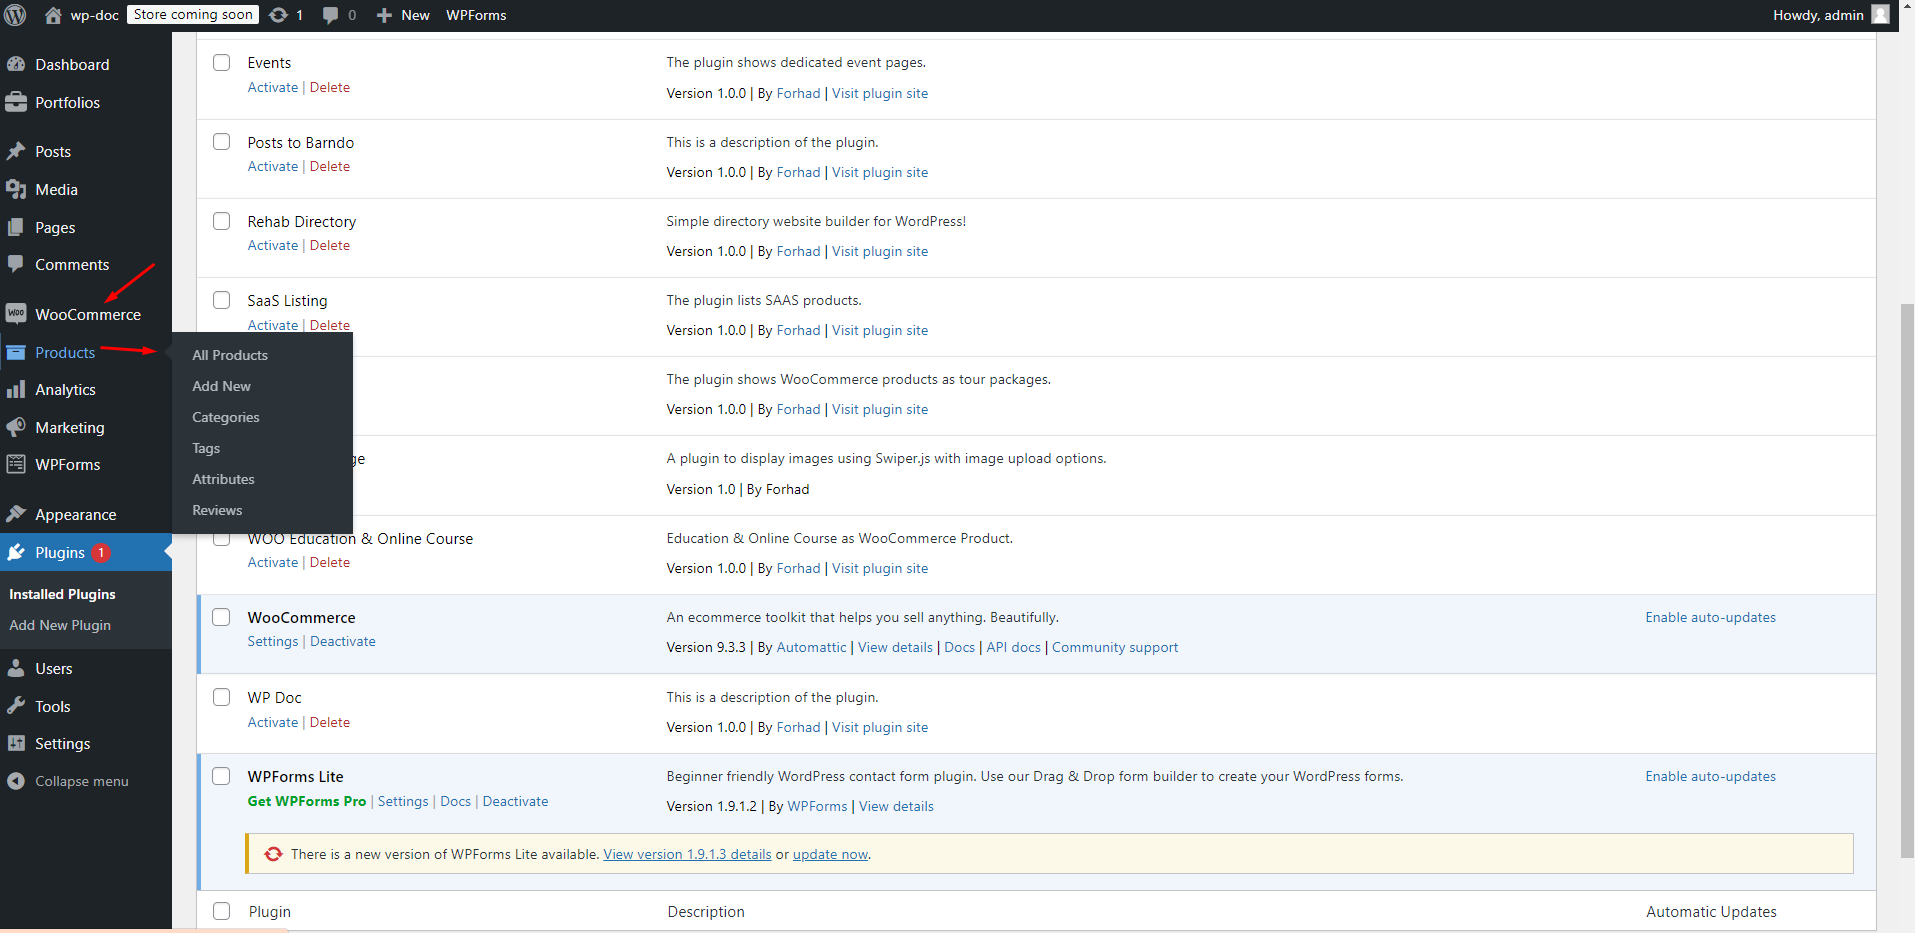
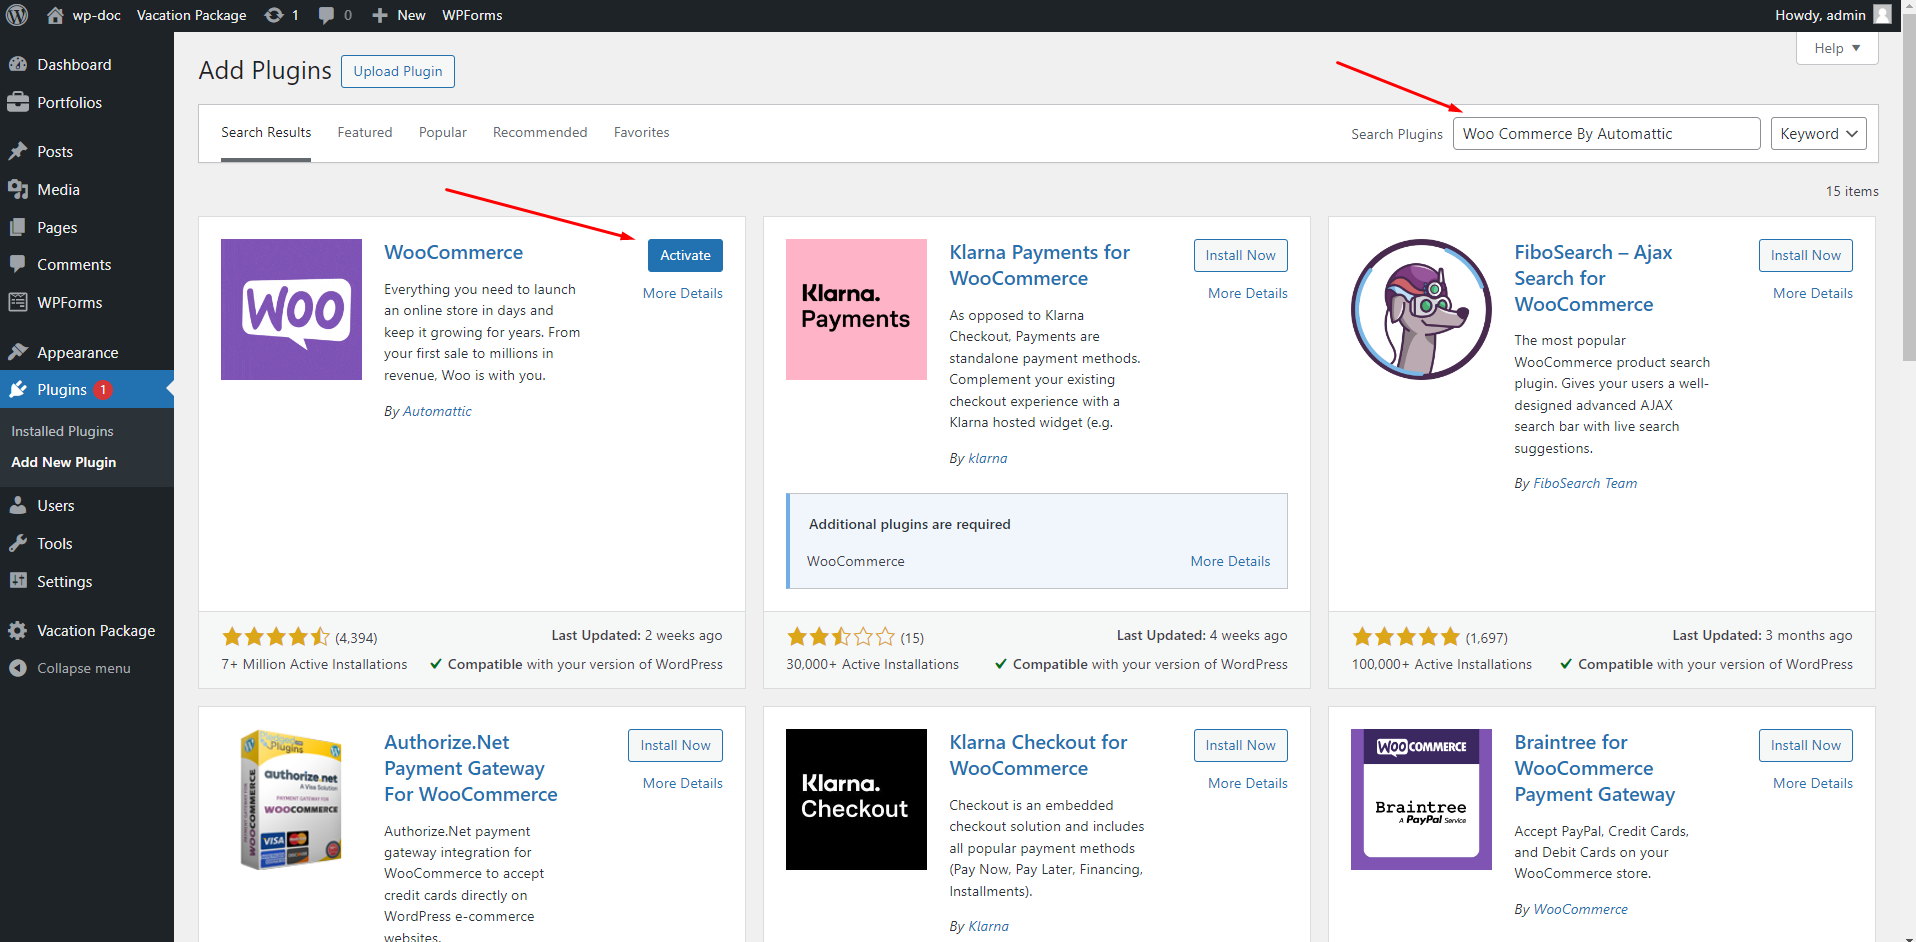
Step 03: To work with this plugin we need to install WooCommerce plugin too. After install WooCommerce option and its menus in our dashboard
like below.
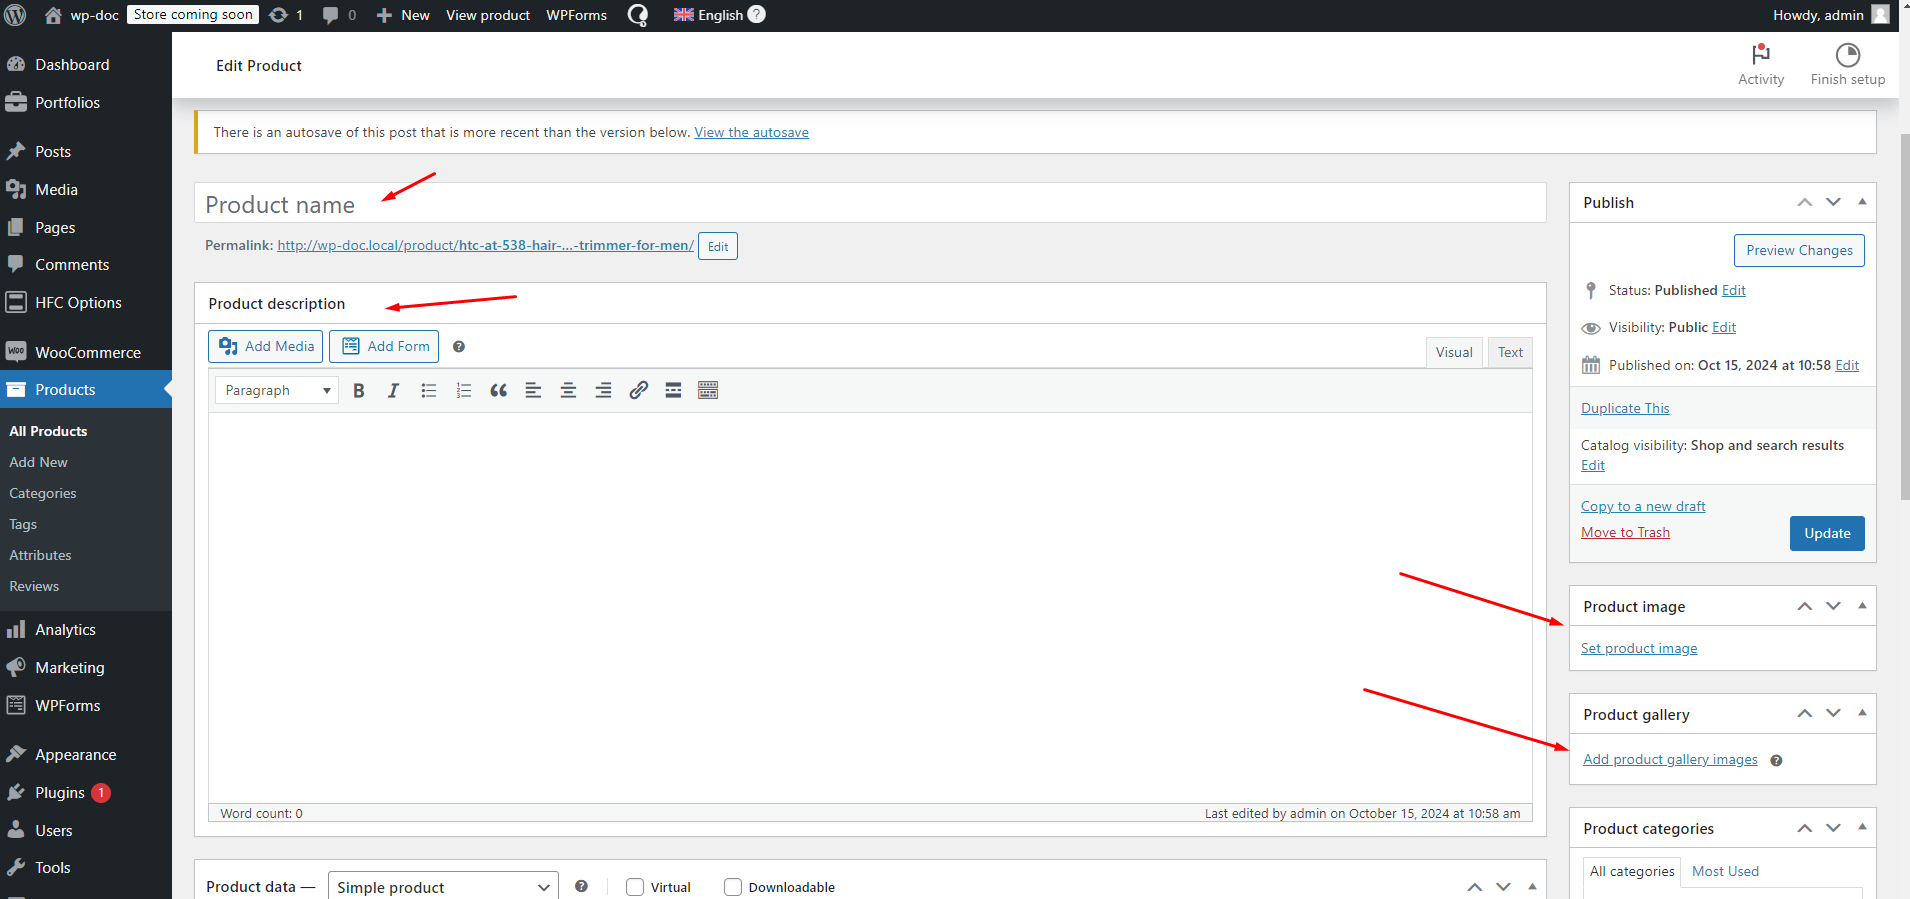
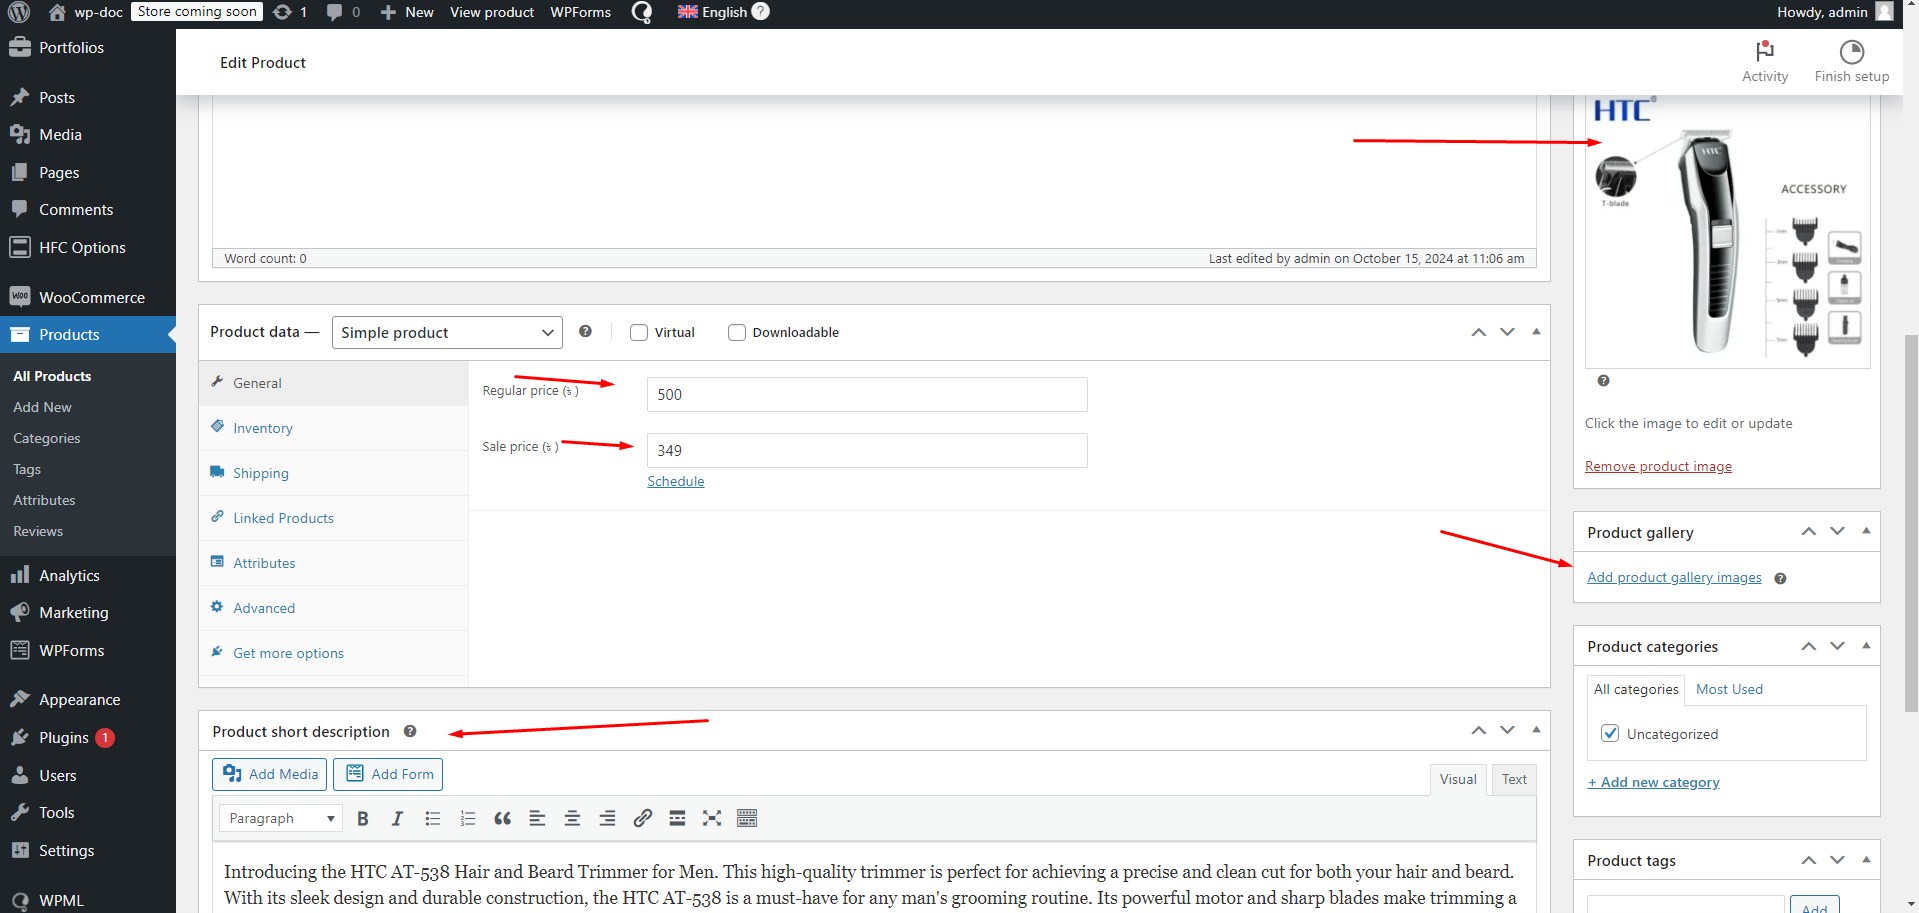
Step 04: Then we have to add a product filling all the require fields
Step 04: Then when we will go single page of a product we will see two buttons for increase and decrease like below

Use our recommended page builder plugin, FancyPost to unlock a number of powerful blocks to help you to design amazing websites!
Experience the Product Quantity Buttons plugin in action with our live demo. Click the button below to see how the "Increase" and "Decrease" buttons enhance the user experience on a WooCommerce product page. Get a firsthand look at how simple and effective managing product quantities can be.
Ready to improve your WooCommerce store's shopping experience? Click the button below to download the Product Quantity Buttons plugin. Install it easily on your WordPress website and start providing your customers with a seamless quantity adjustment feature today.
The Product Quantity Buttons plugin is built to be highly customizable and extensible, allowing developers to add their own features or modify the existing ones using various hooks, filters, and custom code. Below, you'll find examples of how to extend the plugin's functionality and modify its behavior.
1. Customize Button Styling
Developers can change the style of the quantity buttons by adding their custom CSS. Here's how you can add a custom class to modify the "Increase" and "Decrease" buttons:
add_action('wp_enqueue_scripts', 'custom_pq_button_styles');
function custom_pq_button_styles() {
    wp_add_inline_style('product-quantity-buttons-style', '
        .pq-button {
            background-color: #0073aa;
            color: #ffffff;
            border: none;
            padding: 10px;
            cursor: pointer;
        }
        .pq-button:hover {
            background-color: #005f7f;
        }
    ');
}
This snippet will add custom styling to the buttons to make them match your website’s theme.
2. Customizing Button Behavior with JavaScript
Add custom JavaScript to change the functionality of the buttons, such as adding animation or changing increment behavior.
add_action('wp_footer', 'custom_pq_button_js');
function custom_pq_button_js() {
    ?>
    <script type="text/javascript">
        document.addEventListener('DOMContentLoaded', function() {
            const increaseButtons = document.querySelectorAll('.pq-increase');
            const decreaseButtons = document.querySelectorAll('.pq-decrease');

            increaseButtons.forEach(button => {
                button.addEventListener('click', () => {
                    // Add custom animation or logging here
                    console.log('Product quantity increased');
                });
            });

            decreaseButtons.forEach(button => {
                button.addEventListener('click', () => {
                    // Add custom animation or logging here
                    console.log('Product quantity decreased');
                });
            });
        });
    </script>
    <?php
}
This JavaScript example adds an event listener to the increase and decrease buttons, allowing developers to add custom behavior or animations.
3. Add Custom Hooks to Extend Functionality
The plugin includes hooks that you can use to extend its behavior. Here’s an example of how you can use these hooks to add a message when the quantity is changed:
add_action('pq_quantity_updated', 'custom_quantity_update_message', 10, 2);
function custom_quantity_update_message($product_id, $new_quantity) {
    if ($new_quantity > 5) {
        echo '<div class="notice">You have selected more than 5 items. Bulk discounts may apply!</div>';
    }
}
This code adds a custom message when the selected product quantity exceeds 5.
4. Filter to Adjust Increment Step Value
Use a filter to change the increment step value for specific products or product categories:
add_filter('pq_button_increment_step', 'custom_increment_step', 10, 2);
function custom_increment_step($step, $product) {
    if (has_term('special-category', 'product_cat', $product->get_id())) {
        $step = 2; // Set increment step to 2 for products in 'special-category'
    }
    return $step;
}
In this example, products in the "special-category" category will have their quantity increased or decreased by 2 when using the buttons.
5. Adding Quantity Buttons Using a Shortcode
If you want to add quantity buttons outside of the default WooCommerce product page, you can use a shortcode:
function pq_quantity_buttons_shortcode($atts) {
    $atts = shortcode_atts(array(
        'product_id' => 0,
    ), $atts, 'pq_quantity_buttons');

    if ($atts['product_id']) {
        // Output the quantity buttons for the specified product
        echo '<div class="pq-quantity-buttons">';
        echo '<button class="pq-decrease">-</button>';
        echo '<input type="number" value="1" min="1" max="10" />';
        echo '<button class="pq-increase">+</button>';
        echo '</div>';
    }
}
add_shortcode('pq_quantity_buttons', 'pq_quantity_buttons_shortcode');
With this shortcode, you can insert quantity buttons anywhere on your site by using [pq_quantity_buttons product_id="123"] where "123" is the ID of the product.
We are always looking to improve! If you have any suggestions for new features or improvements to the plugin, feel free to reach out to us. Your feedback helps us make Easy Job Listing even better.(Contact form , Telegram, WhatsApp, Messenger)
If you enjoy using Product Quantity Buttons and would like to support its continued development, please consider making a donation. Your contributions will help us add more features, provide regular updates, and continue offering support to all users.